Settings

If you are looking for installation instructions, please refer to Install Kinto.
Kinto is built to be highly configurable. As a result, the related configuration can be verbose, but don’t worry, all configuration flags are listed below.
Environment variables
In order to ease deployment or testing strategies, Kinto reads settings
from environment variables, in addition to .ini files.
The environment variables are exactly the same as the settings, but they
are capitalised and . are replaced by _.
For example, kinto.storage_backend is read from environment variable
KINTO_STORAGE_BACKEND (if defined of course).
All settings are read first from the environment variables, then from
application .ini, and finally from internal defaults.
Feature settings
Setting name |
Default |
What does it do? |
|---|---|---|
kinto.readonly |
|
If set to true, the whole service will reject every write operation.
Note that with this option, the |
kinto.batch_max_requests |
|
The maximum number of requests that can be sent to the batch endpoint. |
kinto.paginate_by |
|
The maximum number of items to include on a response before enabling
pagination. If set to |
kinto.<object-type>_id_generator |
|
The Python dotted location of the generator class that should be used
to generate identifiers on a POST endpoint.
Object type is one of |
kinto.experimental_collection_schema_validation |
|
Experimental: Allow definition of JSON schema at the collection level, in order to validate submitted records. It is marked as experimental because the API might be subject to changes. |
kinto.experimental_permissions_endpoint |
|
Experimental: Add a new |
kinto.trailing_slash_redirect_enabled |
|
Try to redirect resources removing slash or adding it for the root URL
endpoint: |
kinto.trailing_slash_redirect_ttl_seconds |
|
Seconds specified in cache control headers on trailing slash redirects.
Set to |
kinto.heartbeat_timeout_seconds |
|
The maximum duration of each heartbeat entry, in seconds. |
Note
kinto.readonly will disable every endpoint that is not accessed with one of
GET, OPTIONS, or HEAD HTTP methods. Requests will receive a
405 Method Not Allowed error response.
The cache backend will still needs read-write privileges, in order to cache OAuth authentication states and tokens for example.
Backends
Kinto relies on three types of backends: storage, cache and permission. The settings names have a different prefix for each.
For each of them, the supported services are currently PostgreSQL, and Memory. Memcached is also available as a cache backend.
Storage
Setting name |
Default |
What does it do? |
|---|---|---|
kinto.storage_backend |
|
The Python dotted location of the storage backend to use. |
kinto.storage_url |
|
The URL to use to authenticate to the storage backend. e.g.
|
kinto.storage_max_fetch_size |
|
The maximum number of items that can be returned by one request to the storage backend. If no pagination is enabled, this is the maximum number of items that can be stored in a collection (otherwise some of them won’t be returned). With pagination enabled, this limitation doesn’t apply. |
kinto.storage_pool_size |
|
The size of the pool of connections to use for the storage backend. |
kinto.storage_max_overflow |
|
Number of connections that can be opened beyond pool size. |
kinto.storage_pool_recycle |
|
Recycle connections after the given number of seconds has passed. |
kinto.storage_pool_timeout |
|
Number of seconds to wait before giving up on getting a connection from the pool. |
kinto.storage_max_backlog |
|
Number of threads that can be in the queue waiting for a connection. |
kinto.storage_backend = kinto.core.storage.postgresql
kinto.storage_url = postgresql://postgres:postgres@localhost/postgres

# Safety limit while fetching from storage
# kinto.storage_max_fetch_size = 10000

# Control number of pooled connections
# kinto.storage_pool_size = 50
Cache
Setting name |
Default |
What does it do? |
|---|---|---|
kinto.cache_backend |
|
The Python dotted location of the cache backend to use. |
kinto.cache_url |
|
The URL to use to authenticate to the cache backend. e.g.
|
kinto.cache_prefix |
|
A prefix added to each key. Useful when having multiple Kinto using the same cache database. |
kinto.cache_max_size_bytes |
|
The maximum size the memory cache backend will allow per process. (in bytes) |
kinto.cache_pool_size |
|
The size of the pool of connections to use for the cache backend. |
kinto.cache_max_overflow |
|
Number of connections that can be opened beyond pool size. |
kinto.cache_pool_recycle |
|
Recycle connections after the given number of seconds has passed. |
kinto.cache_pool_timeout |
|
Number of seconds to wait before giving up on getting a connection from the pool. |
kinto.cache_max_backlog |
|
Number of threads that can be in the queue waiting for a connection. |
kinto.cache_hosts |
|
The space separated list of Memcached hosts. |
For PostgreSQL
kinto.cache_backend = kinto.core.cache.postgresql
kinto.cache_url = postgresql://postgres:postgres@localhost/postgres

# Control number of pooled connections
# kinto.cache_pool_size = 50
For Memcached
You would need to install the memcached dependencies: pip install kinto[memcached]
kinto.cache_backend = kinto.core.cache.memcached
kinto.cache_hosts = 127.0.0.1:11211 127.0.0.2:11211
Permissions
Setting name |
Default |
What does it do? |
|---|---|---|
kinto.permission_backend |
|
The Python dotted location of the permission backend to use. |
kinto.permission_url |
|
The URL to use to authenticate to the permission backend. e.g.
|
kinto.permission_pool_size |
|
The size of the pool of connections to use for the permission backend. |
kinto.permission_max_overflow |
|
Number of connections that can be opened beyond pool size. |
kinto.permission_pool_recycle |
|
Recycle connections after the given number of seconds has passed. |
kinto.permission_pool_timeout |
|
Number of seconds to wait before giving up on getting a connection from the pool. |
kinto.permission_max_backlog |
|
Number of threads that can be in the queue waiting for a connection. |
kinto.permission_backend = kinto.core.permission.postgresql
kinto.permission_url = postgresql://postgres:postgres@localhost/postgres

# Control number of pooled connections
# kinto.permission_pool_size = 50
Bypass permissions with configuration
Permissions are usually retrieved from the permission backend. However, it is also possible to configure them from settings, and it will bypass the permission backend.
For example, for a resource named “bucket”, the following setting will enable authenticated people to create bucket records:
kinto.bucket_create_principals = system.Authenticated
The format of these permission settings is
<resource_name>_<permission>_principals = comma,separated,principals.
If you want to give all permissions to a user you can use the following configuration:
# Kinto Admin Users Configuration
## Accounts
kinto.account_create_principals = account:admin
kinto.account_write_principals = account:admin
kinto.account_read_principals = account:admin

## Buckets
kinto.bucket_create_principals = account:admin
kinto.bucket_write_principals = account:admin
kinto.bucket_read_principals = account:admin

## Collections
kinto.collection_create_principals = account:admin
kinto.collection_write_principals = account:admin
kinto.collection_read_principals = account:admin

## Groups
kinto.group_create_principals = account:admin
kinto.group_write_principals = account:admin
kinto.group_read_principals = account:admin

## Records
kinto.record_create_principals = account:admin
kinto.record_write_principals = account:admin
kinto.record_read_principals = account:admin
Scheme, host, and port
By default, Kinto relies on WSGI for underlying details like host, port, or request scheme. Tuning these settings may be necessary when the application runs behind proxies or load balancers, but most implementations (such as uWSGI) provide adequate values automatically.
That said, if ever these items need to be controlled at the application layer, the following settings are available:
Check the behaviour of the server with the url value returned in the
hello view.
Setting name |
Default |
What does it do? |
|---|---|---|
kinto.http_host |
|
The HTTP Host used by Kinto to refer to itself. If set to None, the HTTP host is read from HTTP headers or WSGI environment. |
kinto.http_scheme |
|
The HTTP scheme used by Kinto to refer to itself. If set to None, the HTTP scheme is read from the HTTP headers or WSGI environment. |
# kinto.http_scheme = https
# kinto.http_host = production.server.com:7777
Plugins
It is possible to extend the default Kinto behaviors by using “plugins”.
The list of plugins to load at startup can be specified in the settings, as a list of Python modules:
kinto.includes = kinto.plugins.default_bucket
                 kinto.plugins.history
                 kinto.plugins.admin
                 kinto-attachment
                 custom-myplugin
Built-in plugins |
What does it do? |
|---|---|
|
It allows users to sign-up and authenticate using username and password (more details). |
|
It is a Web admin UI to manage data from a Kinto server. (more details). |
|
It enables a personal bucket |
|
Adds an endpoint to completely remove all data from the database backend for testing/staging purposes. (more details). |
|
It tracks every action performed on objects within a bucket (more details). |
|
It allows to authenticate users using OpenID Connect from Google, Microsoft, Auth0, etc. (more details). |
|
Send metrics about backend duration, authentication, endpoints hits, .. (more details). |
|
Send metrics about backend duration, authentication, endpoints hits, .. (more details). |
There are many available packages in the Pyramid ecosystem, and it is straightforward to build one,
since the specified module must just define an includeme(config) function.
See also: How to write a Kinto plugin? for more in-depth informations on how to create your own plugin.
Pluggable components
Pluggable components can be substituted from configuration files, as long as the replacement follows the original component API.
kinto.logging_renderer = your_log_renderer.CustomRenderer
This is the simplest way to extend Kinto, but will be limited to its existing components (cache, storage, log renderer, …).
In order to add extra features, including external packages is the way to go!
Logging and Monitoring
Standard Logging
With the following configuration, all logs are redirected to standard output (See 12factor app):
[loggers]
keys = root

[handlers]
keys = console

[formatters]
keys = generic

[logger_root]
level = DEBUG
handlers = console

[handler_console]
class = StreamHandler
args = (sys.stdout,)
level = NOTSET
formatter = generic

[formatter_generic]
format = %(asctime)s,%(msecs)03d %(levelname)-5.5s [%(name)s] %(message)s
datefmt = %H:%M:%S
Example output:
16:18:57,179 INFO  [root] Running kinto 6.1.0.dev0.
16:19:00,729 INFO  [request.summary]
16:19:22,232 WARNI [kinto.core.authorization] Permission not granted.
16:19:22,238 INFO  [request.summary]
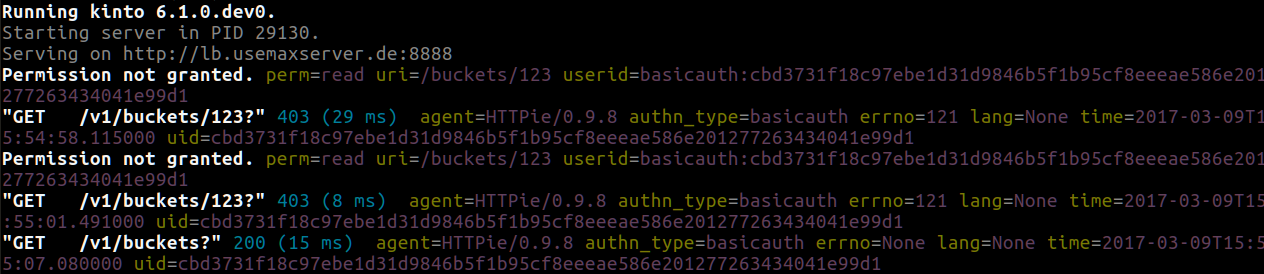
Colored Logging
[formatters]
keys = color

[formatter_color]
class = logging_color_formatter.ColorFormatter
Example output:
JSON Logging
Using a JSON logging formatter, like this one, it is possible to output logs as JSON:
[formatters]
keys = json

[formatter_json]
class = kinto.core.JsonLogFormatter
Example output:
{"Pid": 19240, "Type": "root", "Timestamp": 1489067815875679744, "Severity": 6, "Hostname": "pluo", "Logger": "%", "EnvVersion": "2.0", "Fields": {"message": "Running kinto 6.1.0.dev0."}}
{"Pid": 19240, "Type": "root", "Timestamp": 1489067817834153984, "Severity": 4, "Hostname": "pluo", "Logger": "%", "EnvVersion": "2.0", "Fields": {"perm": "read", "userid": "ldap:john@corp.com", "message": "Permission not granted.", "uri": "/buckets/123"}}
Request IDs
In order to add requests IDs to log messages, set the provided handler:
[handler_console]
class = kinto.core.StreamHandlerWithRequestID
It will read the value from the X-Request-Id request header if present, or generate a random string when the request is received otherwise.
Handling exceptions with Sentry
Sentry reporting can be enabled via the following settings:
kinto.sentry_dsn = https://userid@o1.ingest.sentry.io/1
kinto.sentry_env = stage

# Integrate logging with Sentry.
# kinto.sentry_breadcrumbs_min_level = 10 # DEBUG
# kinto.sentry_events_min_level = 30 # WARNING
Or the equivalent environment variables:
SENTRY_DSN=https://userid@o1.ingest.sentry.io/1
SENTRY_ENV=stage
Note
The application sends an event on startup (mainly for setup check).
Monitoring with Prometheus
Requires the prometheus-client package (installed with kinto[monitoring]).
Prometheus metrics can be enabled with (disabled by default):
kinto.includes = kinto.plugins.prometheus

# kinto.prometheus_prefix = kinto-prod

# Expose metrics created time (default: true)
# kinto.prometheus_created_metrics_enabled = false

# Control cardinality when URL fields become labels (default: bucket_id collection_id group_id record_id)
# kinto.metrics_matchdict_fields = bucket_id collection_id

# Disable default metrics that are not useful in your use-case
# kinto.disabled_metrics = request_duration_seconds
#                          authentication_basicauth_seconds
#                          backend_permission_seconds
#                          backend_cache_seconds

# Control duration buckets in seconds (global for all histograms)
# kinto.prometheus_histogram_buckets = 0.005 0.1 1 Inf
Metrics can then be crawled from the /__metrics__ endpoint.
Monitoring with StatsD
Requires the statsd package.
Note
Only one of Prometheus and StatsD can be enabled. It will take precedence and the other one will be ignored.
Setting name |
Default |
What does it do? |
|---|---|---|
kinto.statsd_backend |
|
The Python dotted location of the StatsD module that should be used for monitoring. Useful to plug custom implementations like Datadog™. |
kinto.statsd_prefix |
|
The prefix to use when sending data to statsd. |
kinto.statsd_url |
|
The fully qualified URL to use to connect to the statsd host. e.g.
|
StatsD metrics can be enabled with (disabled by default):
kinto.statsd_url = udp://host:8125
# kinto.statsd_prefix = kinto-prod
StatsD can also be enabled at the uWSGI level:
[uwsgi]

# ...

enable-metrics = true
plugin = dogstatsd
stats-push = dogstatsd:host:8125,kinto.{{ $deployment }}
Monitoring with New Relic
Requires the newrelic package.
Setting name |
Default |
What does it do? |
|---|---|---|
kinto.newrelic_config |
|
Location of the newrelic configuration file. |
kinto.newrelic_env |
|
The environment the server runs into |
New Relic can be enabled (disabled by default):
kinto.newrelic_config = /location/of/newrelic.ini
kinto.newrelic_env = prod
Authentication
Kinto authentication mechanism is entirely pluggable. We call them authentication policies.
It is possible to enable several authentication policies. The order matters: when multiple policies are configured, the first one in the list that succeeds is picked.
The name matters: the policy name that is picked will be used as the prefix of the user ID (eg. ldap:alice).
Setting name |
Default |
What does it do? |
|---|---|---|
multiauth.policies |
`` `` |
The list of authentication policies names that are enabled. Each policy is configured using dedicated settings as explained below. |
multiauth.authorization_policy |
|
Python dotted path the authorization policy to use for the permission mecanism. |
Authentication setup
Any authentication policy can be specified through configuration. The list of names in multiauth.policies is the starting point for Kinto to read the respective parameters (multiauth.policy.{name}.* settings).
multiauth.policies = google
multiauth.policy.google.use = kinto.plugins.openid.OpenIDConnectPolicy
multiauth.policy.google.issuer = https://accounts.google.com
multiauth.policy.google.client_id = 42XXXX365001.apps.googleusercontent.com
multiauth.policy.google.client_secret = UAlL-054uyh5in4b6u8jhg5o3hnj
Accounts
With the built-in accounts plugin, users can sign-up and authenticate with username and password.
A common setup would be the following:
Anyone can create accounts
A specific
admincan manage them all
# Enable built-in plugin.
kinto.includes = kinto.plugins.accounts

# Enable authenticated policy.
multiauth.policies = account
multiauth.policy.account.use = kinto.plugins.accounts.AccountsPolicy

# Allow anyone to create accounts.
kinto.account_create_principals = system.Everyone

# Set the session time to live in seconds
kinto.account_cache_ttl_seconds = 30
You can use the create-user command to create an admin:
$ kinto create-user --ini /etc/kinto.ini --username admin --password ThisIsN0tASecurePassword
You can then use this account:admin in your config:
# Allow anyone to create accounts.
kinto.account_create_principals = system.Everyone
# But also allow the admin to update, delete them etc.
kinto.account_write_principals = account:admin
About account management
You can set account_create_principals if you want to limit account creation to certain users. The most common situation is when you want to have a small number of administrators, who are responsible for creating accounts for other users. In this case, you should add the administrators to both account_create_principals and account_write_principals.
kinto.account_create_principals = account:admin ldap:jack@corp.com /buckets/bid/groups/admin
kinto.account_write_principals = account:admin ldap:jack@corp.com /buckets/bid/groups/admin
See the API docs to create accounts, change passwords etc.
OpenID Connect
First of all, you must find an Identity Provider. Google Identity Platform for example, but it may also be Auth0, Microsoft, Yahoo, Paypal, Bitbucket, Ebay, Salesforce, … or whichever platform that publishes its discovery metadata as JSON.
The google name below was chosen arbitrarily. As stated above, it will become the user ID prefix (e.g. google:someuser@gmail.com) and will appear in the OAuth authorized redirect URL.
While setting up the Identity Provider, you might have to fill some URLs related to your Kinto instance. For example, if you run a single page app on localhost:3000 that interacts with a server on localhost:8888, you should set:
Authorized JavaScript origins:
http://localhost:3000Authorized redirect URIs (aka. callback):
http://localhost:8888/v1/openid/google/token?
Note
If you use the Kinto Admin plugin, the JavaScript origin will be the same as the server (eg. http://localhost:8888) since the Admin Web page is served by the server itself.
Based on the information obtained during this setup, configure the issuer, client_id and client_secret values in Kinto settings:
kinto.includes = kinto.plugins.openid

multiauth.policies = google
multiauth.policy.google.use = kinto.plugins.openid.OpenIDConnectPolicy
multiauth.policy.google.issuer = https://accounts.google.com
multiauth.policy.google.client_id = 42XXXX365001.apps.googleusercontent.com
multiauth.policy.google.client_secret = UAlL-054uyh5in4b6u8jhg5o3hnj
At this point, Kinto should be properly configured and able to start.
OpenID Authentication should work as described in the API docs.
Advanced settings
# User ID field name (Default: `sub`)
multiauth.policy.google.userid_field = email
# Authorization header prefix (Default: `Bearer`)
multiauth.policy.google.header_type = Bearer+OIDC

# User information cache expiration (Default: 1 day)
# Access token verification will be cached during that amount of time.
multiauth.policy.google.verification_ttl_seconds = 86400

# Authentication state cache duration (Default: 1 hour)
# Duration given to users to fill the login form on the Identity Provider.
multiauth.policy.google.state_ttl_seconds = 3600
# State string length (balance between collisions/security and cache size)
multiauth.policy.google.state_length = 32
Of course, multiple OpenID providers can be enabled on the same Kinto server:
multiauth.policies = google auth0
multiauth.policy.google.use = kinto.plugins.openid.OpenIDConnectPolicy
multiauth.policy.google.issuer = https://accounts.google.com
# ...

multiauth.policy.auth0.use = kinto.plugins.openid.OpenIDConnectPolicy
multiauth.policy.auth0.issuer = https://my-service.auth0.com
# ...
Legacy Basic Auth
In the first versions of Kinto, we had a built-in basicauth policy enabled by default.
Basically it generates a unique user identifier from any username/password combination using a HMAC secret.
Bucket IDs are generated using salt declared in default_bucket_hmac_secret.
Even if it was convenient to get started, we decided to get rid of it because it was very confusing. But you can enable it with the follow configuration:
multiauth.policies = basicauth

kinto.userid_hmac_secret = have-you-seen-the-new-carioca
kinto.default_bucket_hmac_secret = bucket-id-random-salt-garam
multiauth.policy.basicauth.use = kinto.core.authentication.BasicAuthAuthenticationPolicy
Custom Authentication
Using the various Pyramid authentication packages, it is possible to plug in any kind of authentication.
In the following example, internal accounts, Persona, and IP Auth are all enabled:
multiauth.policies = account pyramid_persona ipauth

multiauth.policy.account.use = kinto.plugins.account.AccountsPolicy

multiauth.policy.ipauth.use = pyramid_ipauth.IPAuthentictionPolicy
multiauth.policy.ipauth.ipaddrs = 192.168.0.*
multiauth.policy.ipauth.userid = LAN-user
multiauth.policy.ipauth.principals = trusted
Permission handling and authorisation mechanisms are specified directly via configuration. This allows for customised solutions ranging from very simple to highly complex.
Note
Kinto relies on pyramid multiauth to initialise authentication.
Notifications
Kinto has a notification system, and the event listeners are configured using the event_handlers setting, which takes a list of aliases.
In the example below, a custom listener is activated and will send events data:
kinto.event_listeners = mylistener

kinto.event_listeners.mylistener.use = mylistener.listeners
kinto.event_listeners.mylistener.param = 42
Filtering
It is possible to filter events by action and/or types of object. By
default actions create, update and delete are notified
for every kinds of objects.
kinto.event_listeners.mylistener.actions = create
kinto.event_listeners.mylistener.resources = bucket collection
Cross Origin requests (CORS)
Kinto supports CORS out of the box. Use the cors_origins setting to change the list of accepted origins.
Setting name |
Default |
What does it do? |
|---|---|---|
kinto.cors_origins |
|
This List of CORS origins to support on all endpoints. By default allow all cross origin requests. |
Backoff indicators
In order to tell clients to back-off (on heavy load for instance), the following flags can be used. Read more about this at Backoff header on heavy load.
Setting name |
Default |
What does it do? |
|---|---|---|
kinto.backoff |
|
The Backoff time to use. If set to None, no backoff flag is sent to the clients. If set, provides the client with a number of seconds during which it should avoid doing unnecessary requests. |
kinto.backoff_percentage |
|
If specified, then send the backoff header with probability equal to the backoff_percentage. This should be a number between 0 and 100. This setting will have no effect if the backoff is None. |
kinto.retry_after_seconds |
|
The number of seconds after which the client should issue requests. |
# kinto.backoff = 10
kinto.retry_after_seconds = 30
Similarly, the end of service date can be specified by using these settings.
Setting name |
Default |
What does it do? |
|---|---|---|
kinto.eos |
|
The End of Service Deprecation date. If the date specified is in the future, an alert will be sent to clients. If it’s in the past, the service will be declared as decomissionned. If set to None, no End of Service information will be sent to the client. |
kinto.eos_message |
|
The End of Service message. If set to None, no End of Service message will be sent to the clients. |
kinto.eos_url |
|
The End of Service information URL. |
kinto.eos = 2015-01-22
kinto.eos_message = "Client is too old"
kinto.eos_url = http://website/info-shutdown.html
Enabling or disabling endpoints
Specific resource operations can be disabled.
To do so, a setting key must be defined for the disabled resources endpoints:
'kinto.{endpoint_type}_{resource_name}_{method}_enabled'
Where:
endpoint_type is either
plural(e.g./buckets) orobject(e.g./buckets/abc);resource_name is the name of the resource (e.g.
bucket,group,collection,record);method is the http method (in lower case) (e.g.
get,post,put,patch,delete).
For example, to disable the POST on the list of buckets and DELETE on single records, the
following setting should be declared in the .ini file:
kinto.plural_bucket_post_enabled = false
kinto.object_record_delete_enabled = false
Activating the permissions endpoint
The Permissions endpoint is used to get a list of all user accessible objects in the server as well as their permissions. It enables applications such as the kinto-admin to discover what the user is allowed to do and which data can be managed.
kinto.experimental_permissions_endpoint = true
Then, issue a GET request to the /permissions endpoint to get the
list of the user permissions on the server ressources.
Client caching
In addition to per-collection caching, it is possible to add cache control headers for the root URL and every Kinto object. The client (or cache server or proxy) will use them to cache the collection records for a certain amount of time, in seconds.
For the root URL endpoint, when the instance is readonly, the cache control header can be adjusted with this setting:
# default is 1 day
kinto.root_cache_expires_seconds = 86400
For GET requests on resource endpoints, on any kind of object (GET /buckets, GET /buckets/{}/groups, GET /buckets/{}/collections,
GET /buckets/{}/collections/{}/records), the settings are:
# kinto.bucket_cache_expires_seconds = 3600
# kinto.group_cache_expires_seconds = 3600
# kinto.collection_cache_expires_seconds = 3600
kinto.record_cache_expires_seconds = 3600
Cache can also be specified for the records of a specific bucket or collection:
kinto.blog.record_cache_expires_seconds = 30
kinto.blog.articles.record_cache_expires_seconds = 3600
If set to 0 then the resource becomes uncacheable (no-cache).
Note
In production, Nginx can act as a cache-server using those client cache control headers.
Project information
Setting name |
Default |
What does it do? |
|---|---|---|
kinto.version_json_path |
|
Location of the file containing the information to be shown in the version endpoint. |
kinto.error_info_link |
|
The HTTP link returned when uncaught errors are triggered on the server. |
kinto.project_docs |
|
The URL where the documentation of the Kinto instance can be found. Will be returned in the hello view. |
kinto.project_name |
|
The name of your project (powered by Kinto) |
kinto.project_version |
|
The version of the project. Will be returned in the hello view. By default, this is the major version of Kinto. |
kinto.version_prefix_redirect_enabled |
|
By default, all endpoints exposed by Kinto are prefixed by a version number. If this flag is enabled, the server will redirect all requests not matching the supported version to the supported one. |
kinto.version_prefix_redirect_ttl_seconds |
|
Seconds specified in cache control headers on version prefix redirects.
Set to |
Example:
kinto.project_docs = https://project.readthedocs.io/
# kinto.project_version = 1.0
Application profiling
It is possible to profile the stack while its running. This is especially useful when trying to find bottlenecks.
Update the configuration file with the following values:
kinto.profiler_enabled = true
kinto.profiler_dir = /tmp/profiling
Run some request on the server (for example):
http GET http://localhost:8888/v1/
Render execution graphs using GraphViz:
sudo apt-get install graphviz
pip install gprof2dot
gprof2dot -f pstats POST.v1.batch.000176ms.1427458675.prof | dot -Tpng -o output.png